1. Touch the screen to turn the system on. Once the system initializes, you will see a screen where you can select Computer or HDMI Laptop. Choose the option you’d like to use to get started. After choosing Computer/Laptop, select Kaltura Live Lecture Capture to proceed.

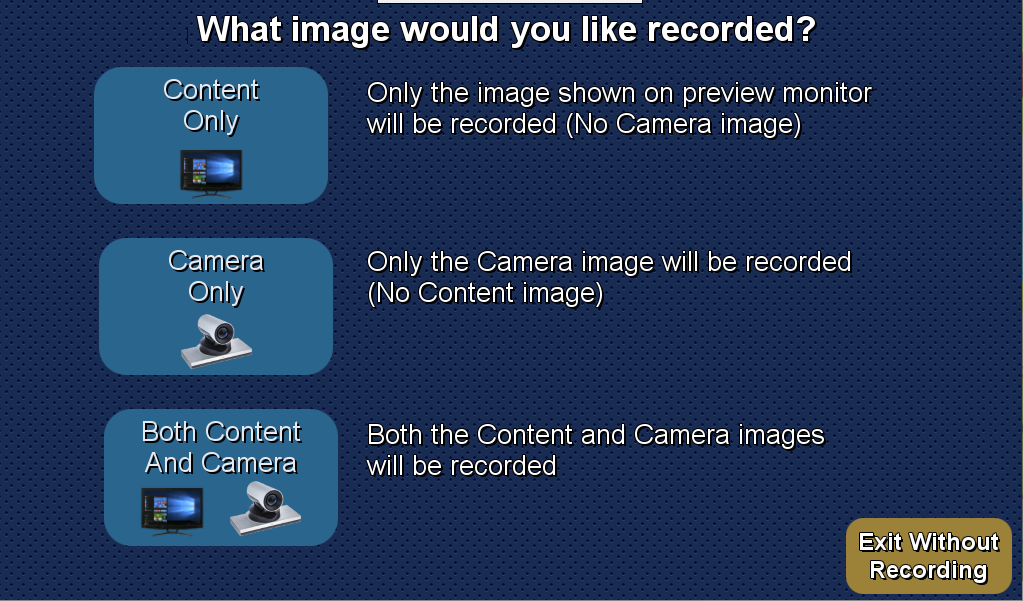
2. Select the the layout of recording you’d like to use. Content only/Camera only/Both content and camera. Please note that you will be able to swap between them as you record.
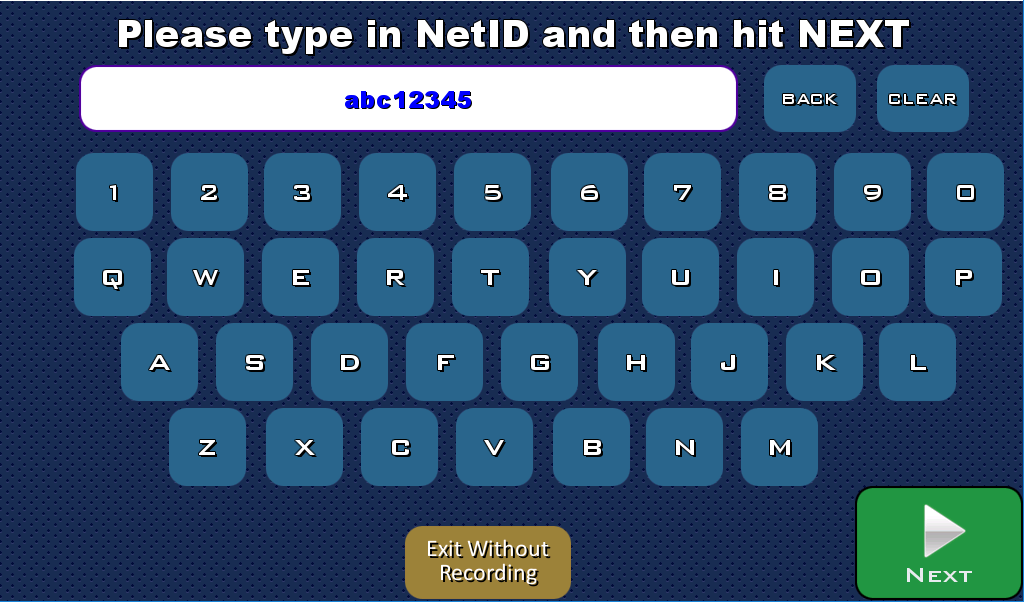
3. Type in your NetID.
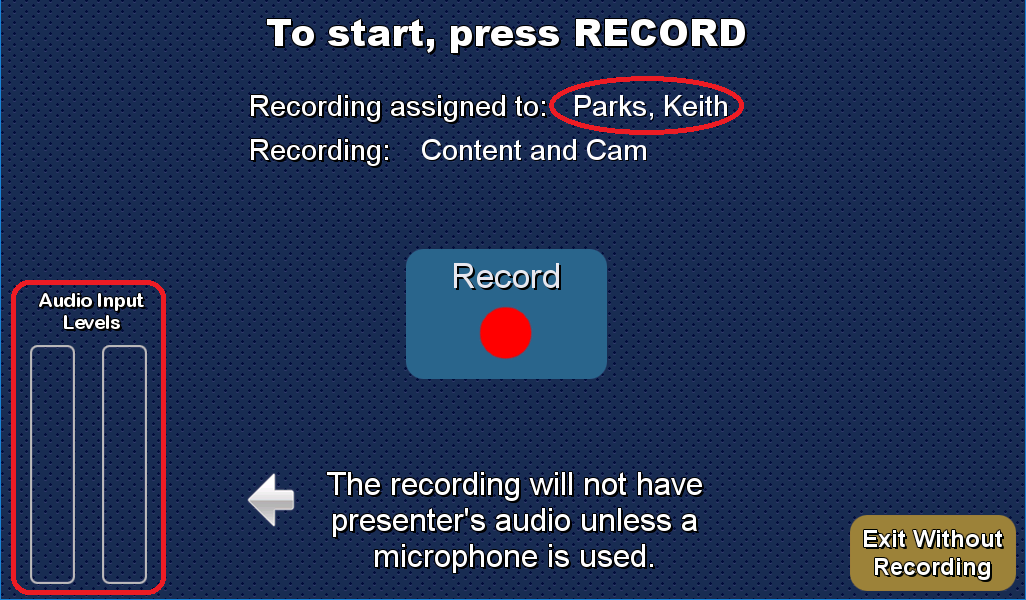
4. Check that you see audio levels moving as you talk and that the recording is being assigned to the NetID previously typed. Press record to begin.
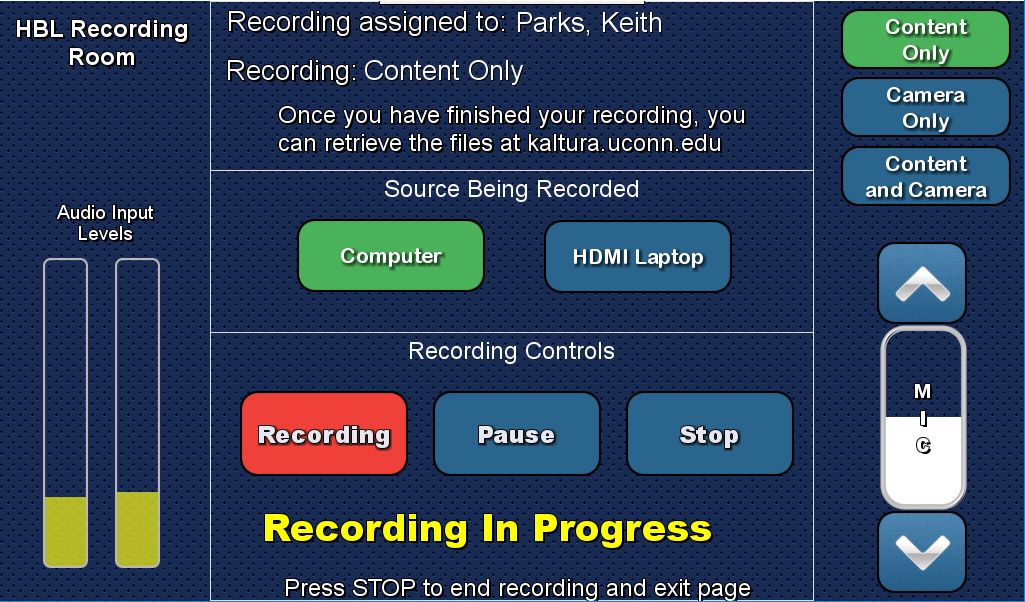
5. You are now ready to start recording. Note the yellow “Recording In Progress” text and audio levels are moving. You can pause/stop the recording, as well as change the layout for your recording.